There is an increasing demand to ensure that your website is https (SSL) enabled. The main purpose is to let your visitors know that they’re browsing on a secure website.
As mentioned in one of my previous posts, I briefly explain why you should consider securing your website.
You have two options. You either pay for your SSL or get it for FREE. Well if you’re like me you’ll opt for the latter. Just to warn you that not everything free is easy. So you’ll need to pull your sleeves up on this one but trust me it’ll be worth it.
Please NOTE the following tutorial is based on the assumption you’ve got GoDaddy as your web host. These steps may vary depending on who your host is. Please check the following article that lists all the web hosts that currently support Lets Encrypt. If your web host is mentioned then you’re in luck and you can follow the steps provided by them.
Unfortunately, there are some naughty web hosts that make our lives a little harder. GoDaddy is one of them. Hence, why I’m going to show you how to overcome this.
Now let’s get cracking!….
- Navigate to https://www.sslforfree.com
- Enter the domain name that needs SSL enabled e.g. thebeautycleanse.com into the field that says ‘enter your website to secure’.
- Click ‘Create FREE SSL Certificate’
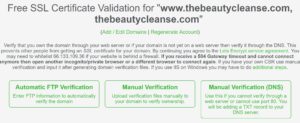
- It should then take you to the next screen that simply asks you to verify that you actually own that domain. You have three options.
- I prefer full control over where I download and upload the files. So I have gone for the ‘Manual Verification’. So let’s click that.
- It will summarise what the steps when you choose this option. Scroll a further down below the bit where it says ‘Manually Verify Domain’ again.
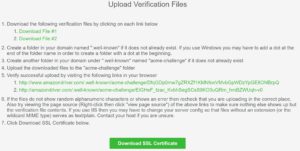
- Hopefully the steps presented to verify the domain are self-explanatory but in summary, you’ll need to:
-
-
- Do an FTP connection to your web hosting area for this domain using a 3rd party tool such as FileZilla or use the web hosts build in one within cPanel if available.
- Create a folder labeled “.well-known” within the root directly. Then inside this folder create another one named “acme-challenge”.
- Download the two files locally to your machine. Then re-upload them into the acme-challenge folder you’ve just created using FTP.
- Click the two verification URL’s mentioned. If you see a blank page with jumbled characters, then you’re good to go. If you get an error message or anything else, the chances are it’s not worked. So you’ll have to re-check your steps or ask your web host as something may be preventing access.
-
- Once verified, click on ‘Download SSL Certificate’. This will download a zip file containing three files. Navigate to the directory where you’ve just downloaded the zip file and extract the files within that folder. So you’ll have something like this:
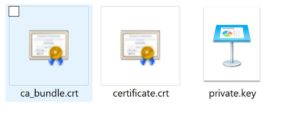 You’ll need to open these files separately into Notepad at a later stage so minimize this folder directory for now.
Now the next steps will vary depending on which web host you’re with. This is being carried out in Go Daddy. As mentioned earlier on, some web hosts already provide support for ‘Let’s Encrypt’ so please read their documentation as the steps may well be different.
- Navigate to the cPanel section for your web hosting and look for SSL/TLS within the Security section and select it.

You’ll be presented with four options. Select the last one that says ‘Manage SSL’.
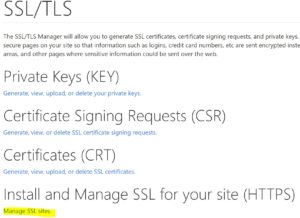
The next stage is important and needs to be done accurately. You need to select the domain that needs https (SSL) enabling.
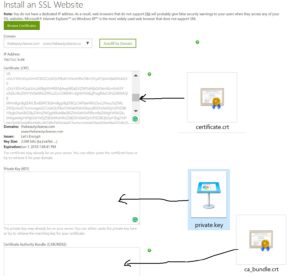
There are three empty boxes. You’ll need to open up each file you download previously in Notepad and copy and paste the entire text directly into the corresponding boxes.
It should look something like this. All there NEED to have green ticks.
FINAL STEP – If you’re good to go then simply click on ‘Install Certificate’. It will let you know if it’s been successful or not.
Once successful. Give it a few minutes and try out your new SSL encrypted domain by typing in https in front of it e.g. https//:www.jassv.com
There you have it! You’ve got yourself an https enabled website!
Do watch this space, as I will also be doing a video on this too in due course.
Please do share this post if you found it useful so that you can also help others in the same shoes. I would love to hear from you if you’ve tried this so please do comment below how you got on.


